|
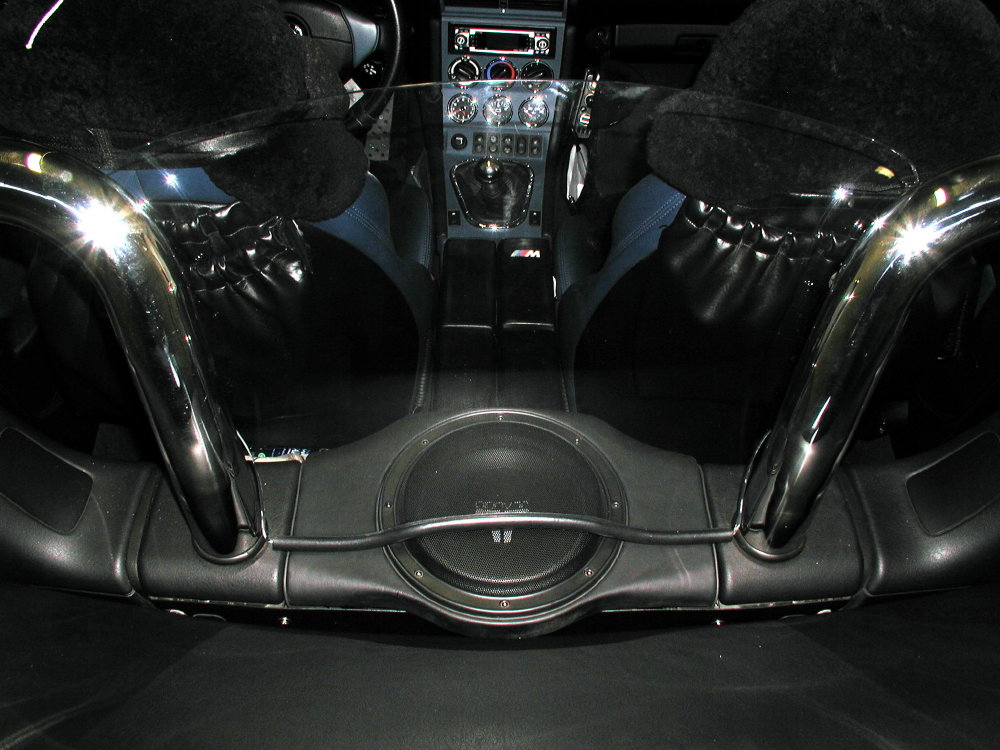
BMW Z3 Custom Stereo installation incorporating the Integral Audio Model 80 SubwooferBy: Gerald (Gerry) Doiron (June 2006) for BMW MZ3 2000 The purpose of this article is to show how a custom installation can be performed to primarily look like a factory install and have the components of the system be hidden to not distract from the cars appearance. The net results being to enhance the sound without showing the hardware. The system is almost completely stealth and not visible from the casual looker except for the head unit, and of course the Model 80, which in itself is designed to look well at home in the Z3 interior. It is assumed here that the installer has already read the sites installation instructions and reviewed the other installations first. The scope of this install goes beyond just the Model 80 and provides insight on a complete engineered system. The original BMW wire harness and connectors are utilized to connect the speakers to the new Amplifiers and Head unit for a clean installation. Click on Images for high resolution pictures. The section headings are as follows: 1) OEM Stereo Components Removed 2) Components Added 3) Special System Parts 4) M80 Installation 5) M80 Supplemental Parts 6) Construction Comments and Observations 7) Listening Impressions
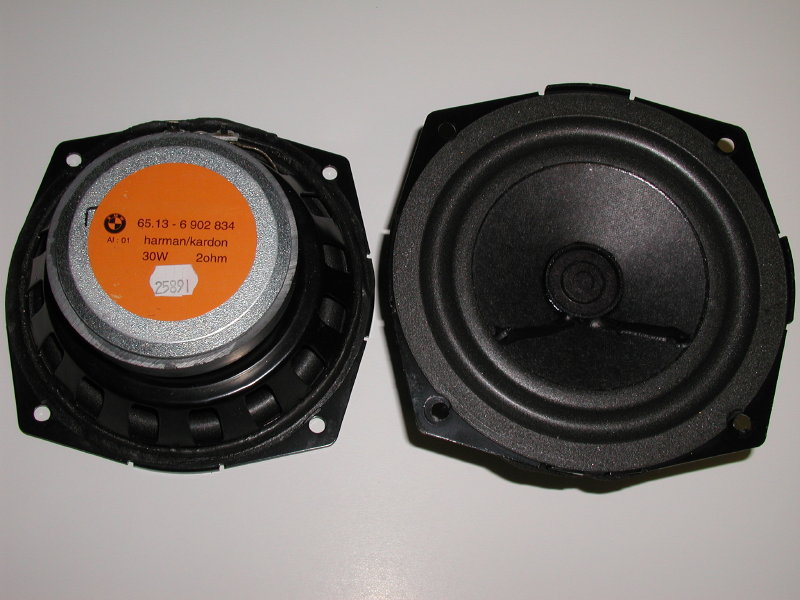
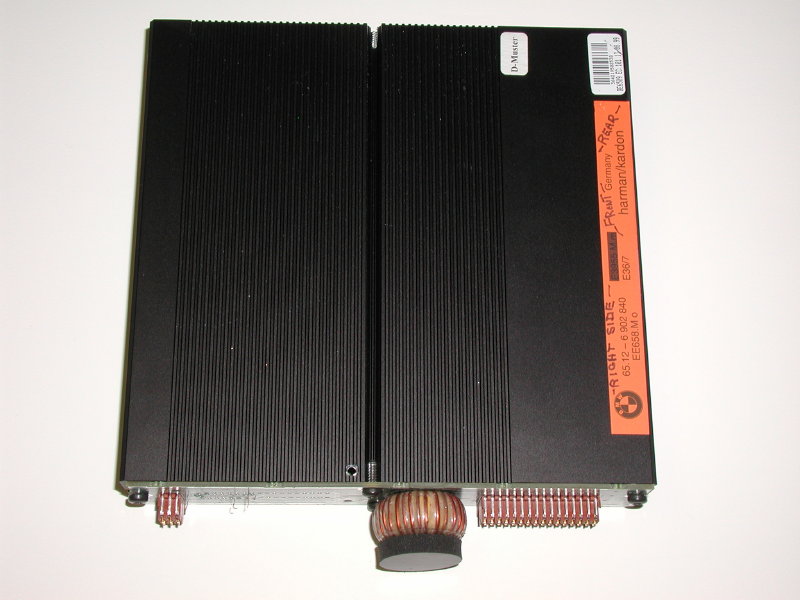
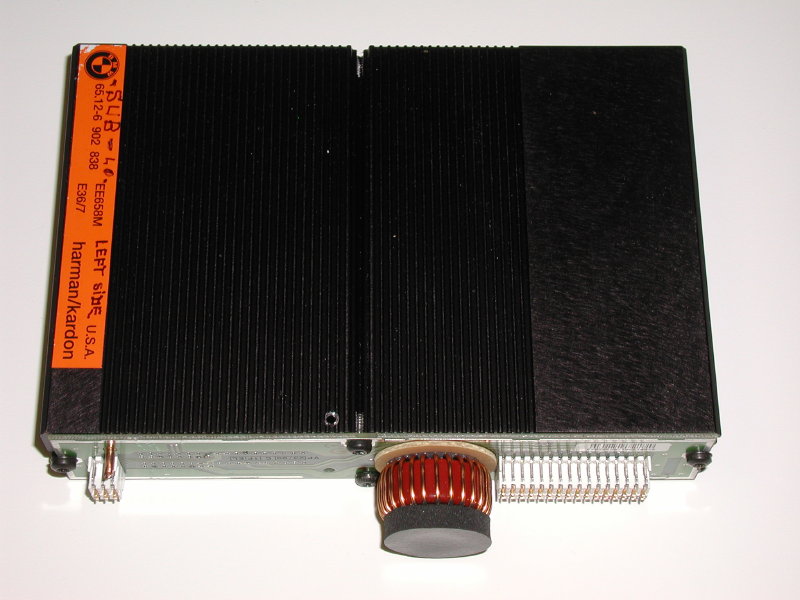
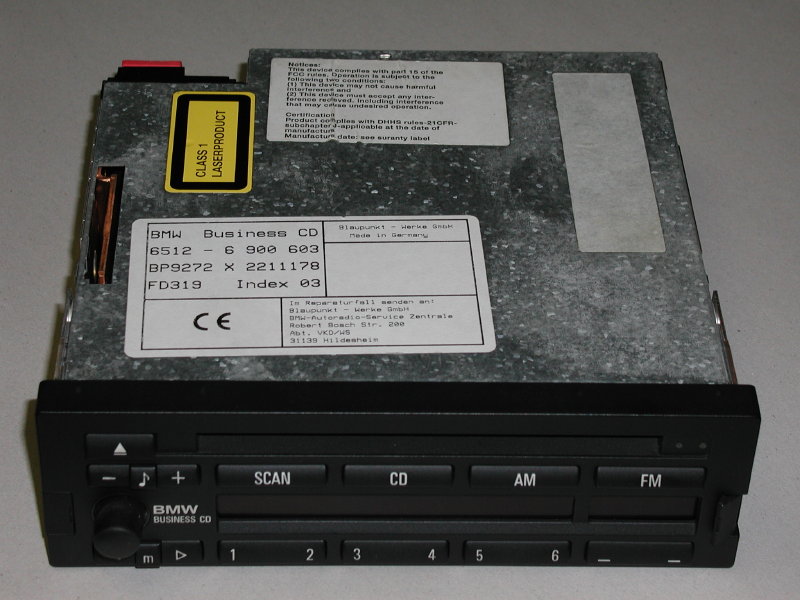
1) OEM STEREO COMPONENTS REMOVED: (Note: these items can be sold on EBay) Harmon Kardon Sub-Woofer Front and Back Harmon Kardon Mids and Tweets Harmon Kardon Floor Pair Harmon Kardon Sub Woofer Amplifier Harmon Kardon Main Amplifier BMW Business CD
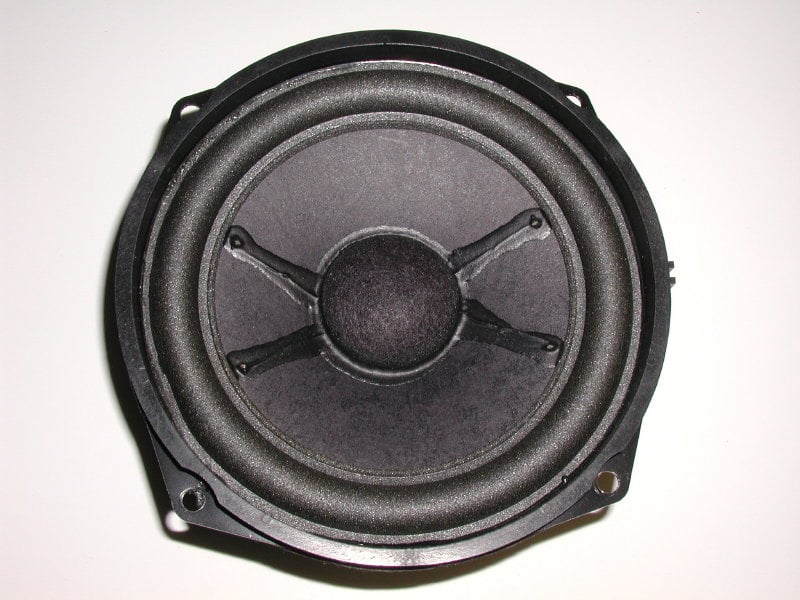
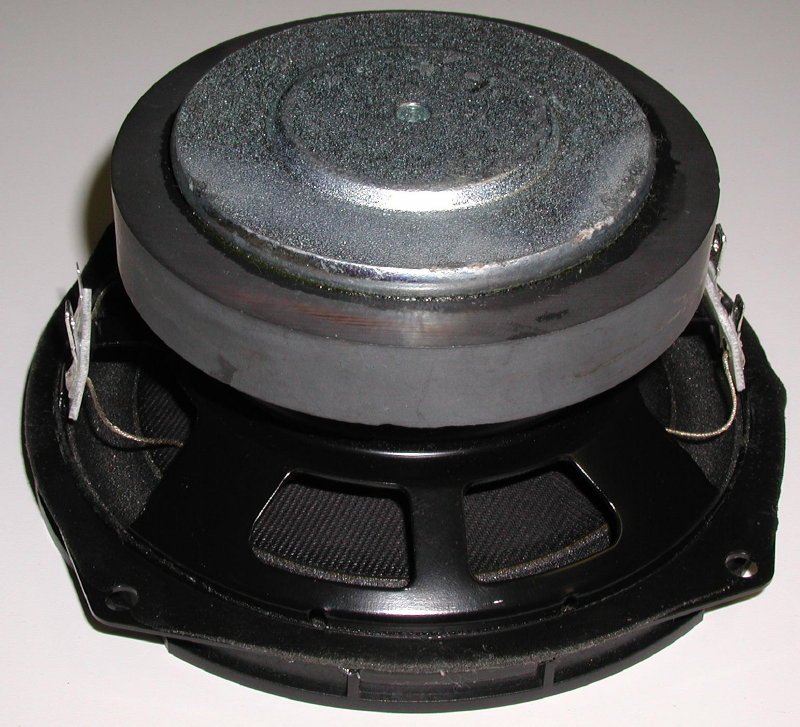
2) COMPONENTS ADDED Manufacturer MODEL # Description Used For: Blaupunkt PA2100 (2) x 100 Wrms (Stereo) Floor+Door Blaupunkt PA2100 (1) x 300 Wrms (Bridged) Subwoofer Integral Audio Model 80 8" Molded SUB Enclosure Subwoofer JL 8w3v2-D2 8" Dual 2+2 Voice Coil Subwoofer MBQ DKE 108 3-1/3" 2-way Coaxial Pair Door Panels MBQ PCE 216 6-1/2" Low, 1" Hi, X-Over Floor Panels
Remove plastic cover from Blaupunkt PA2100 to expose metal enclosure. Remove (black) brackets from HK Amp an wire interface to Harness Socket. Bolt OEM brackets to (silver) Blaupunkt Amplifier to allow form fit mounting. Cross-Over Network shown Wired to Amplifier (installed on brackets) ENCLOSE (2) MBQ CrossOver Boards Back-Back using a strip of Aluminum CROSSOVER INSTALLED NEATLY BEHIND FLOOR COVERING SOME CUTTING REQUIRED FOAM SEAL CUPS TO PREVENT WATER DAMAGE STAINLESS STEEL COFFEE CUP LID (: from dollar store :)
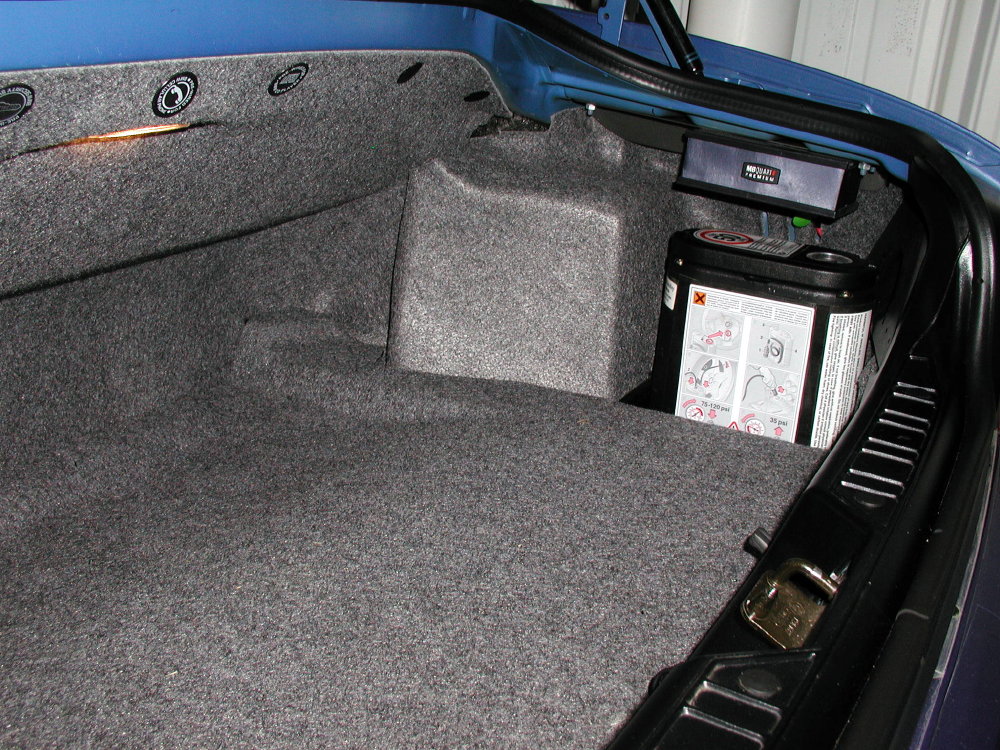
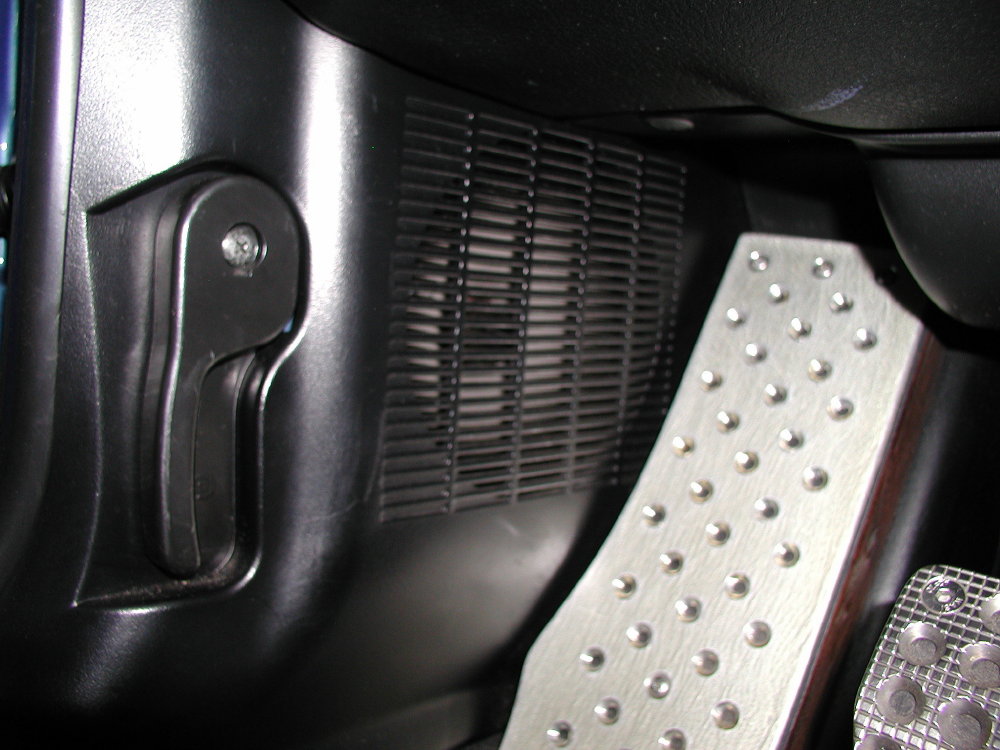
REMOVE this OEM SPEAKER NEW MBQ IN STOCK LOCATION FLOOR MOUNTED MBQ 5-1/2" INSTALLATION 300WATT SUB AMPLIFIER for M80 100WATT X 2 CHANNELS FLOOR + DOOR USE ORIGINAL AMPLIFIER BRACKETS FOR OEM FORM FIT LOOK CLEAN ORIGINAL LOCATION OF AMPLIFIERS YIELDS FULL TRUNK SPACE
3) SPECIAL SYSTEM PARTS Assorted Wire, Fuse Holders, Solder Lugs, Screws, Etc.
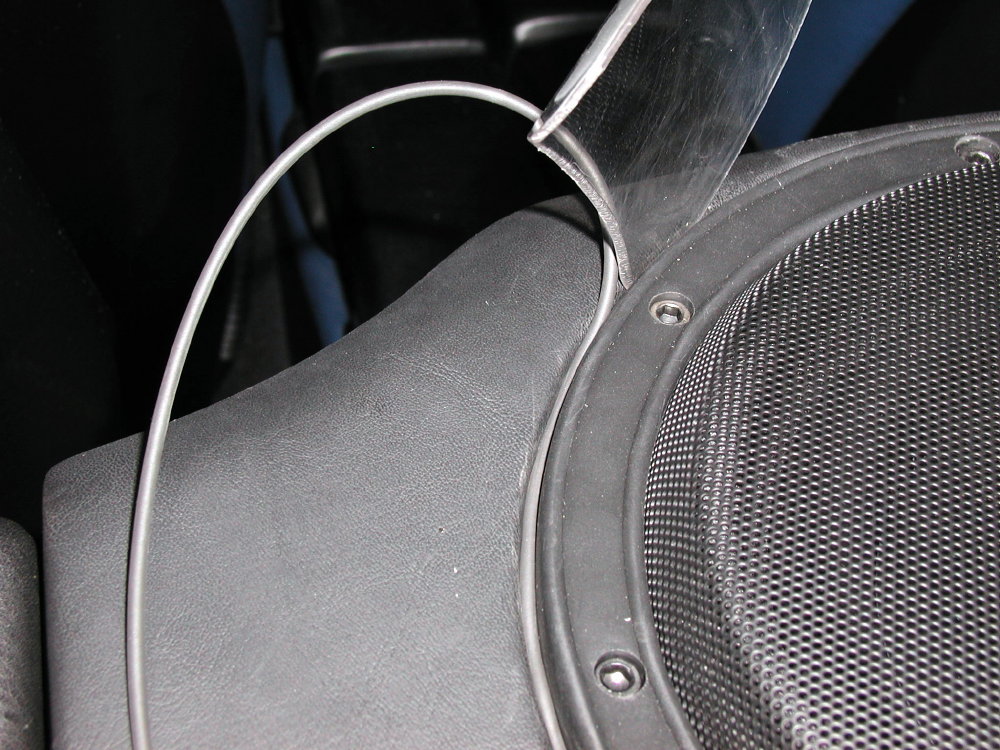
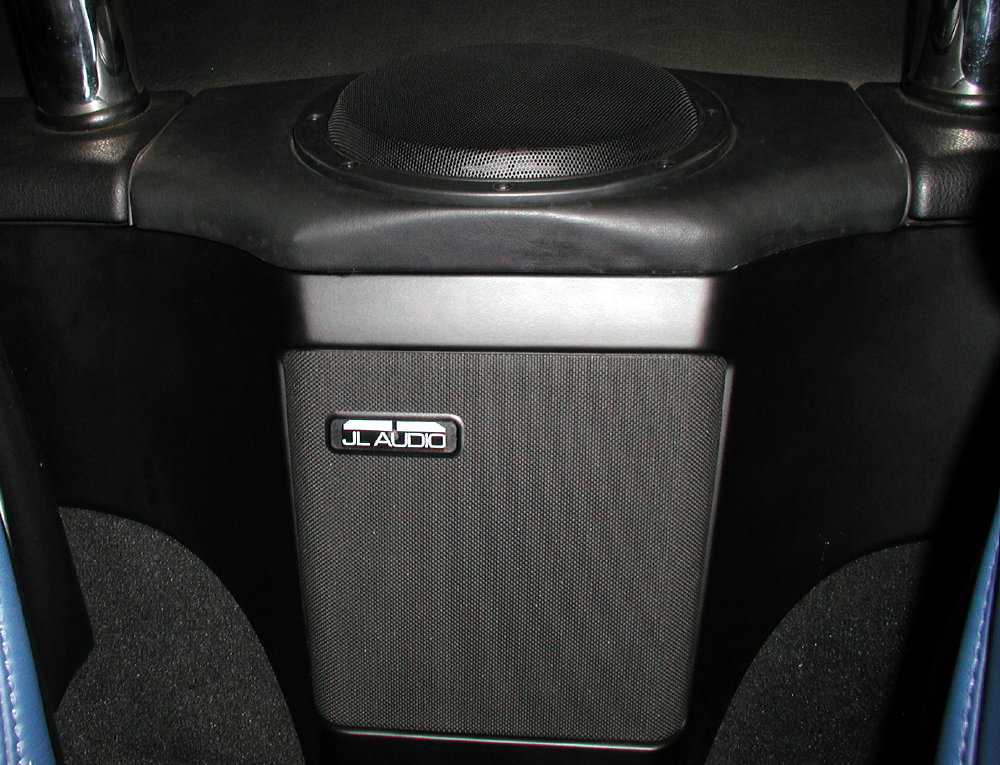
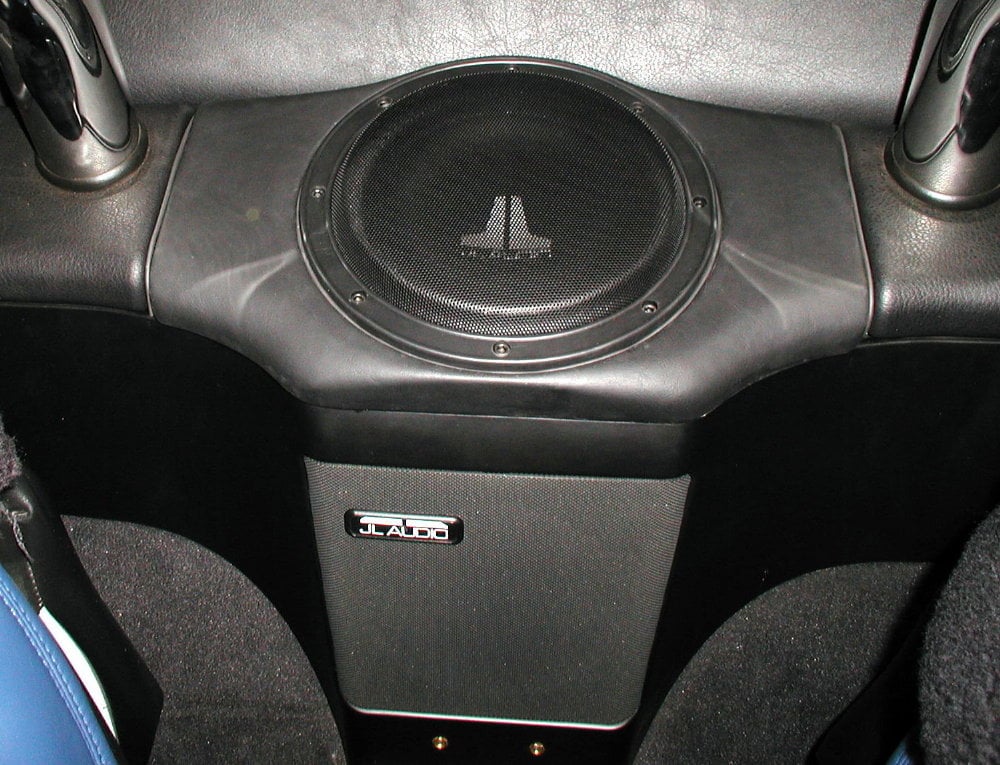
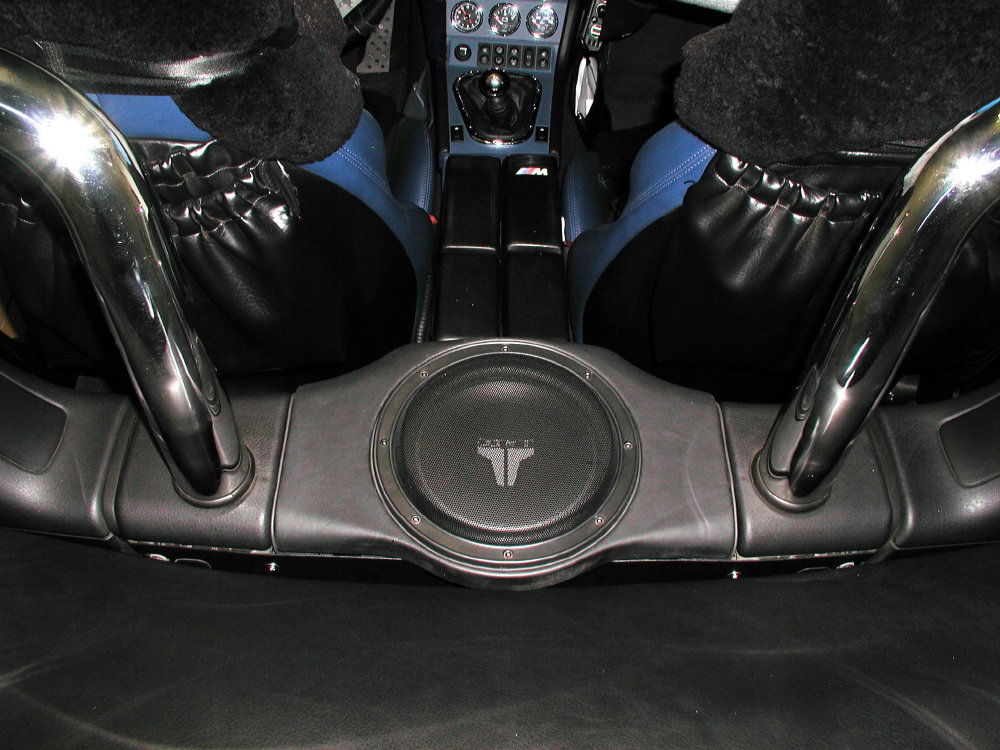
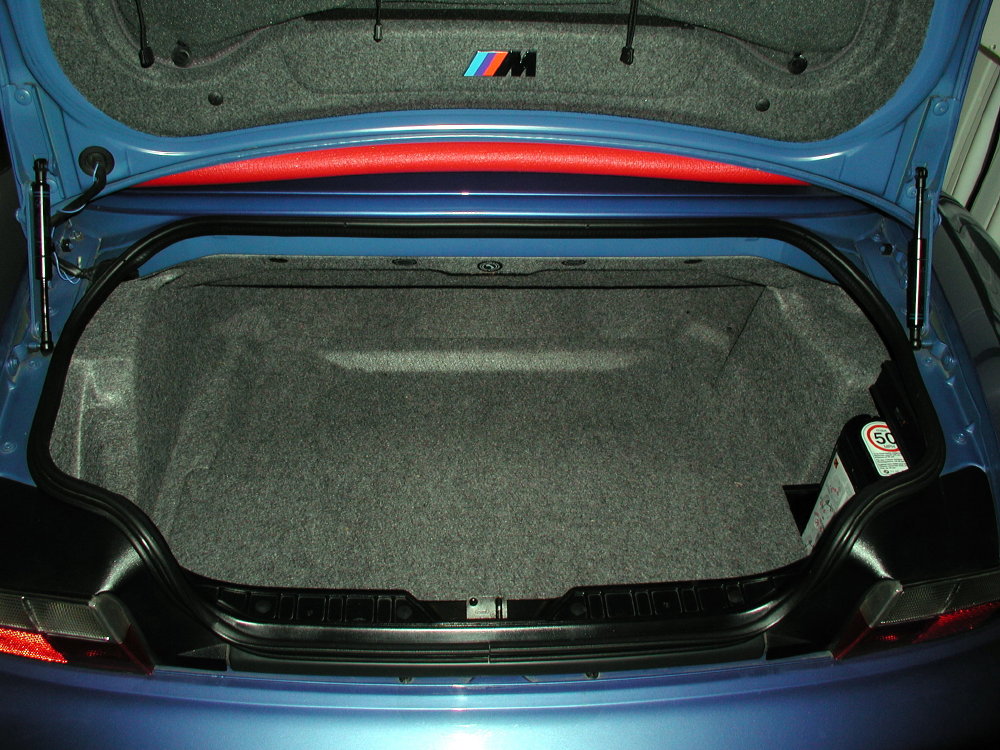
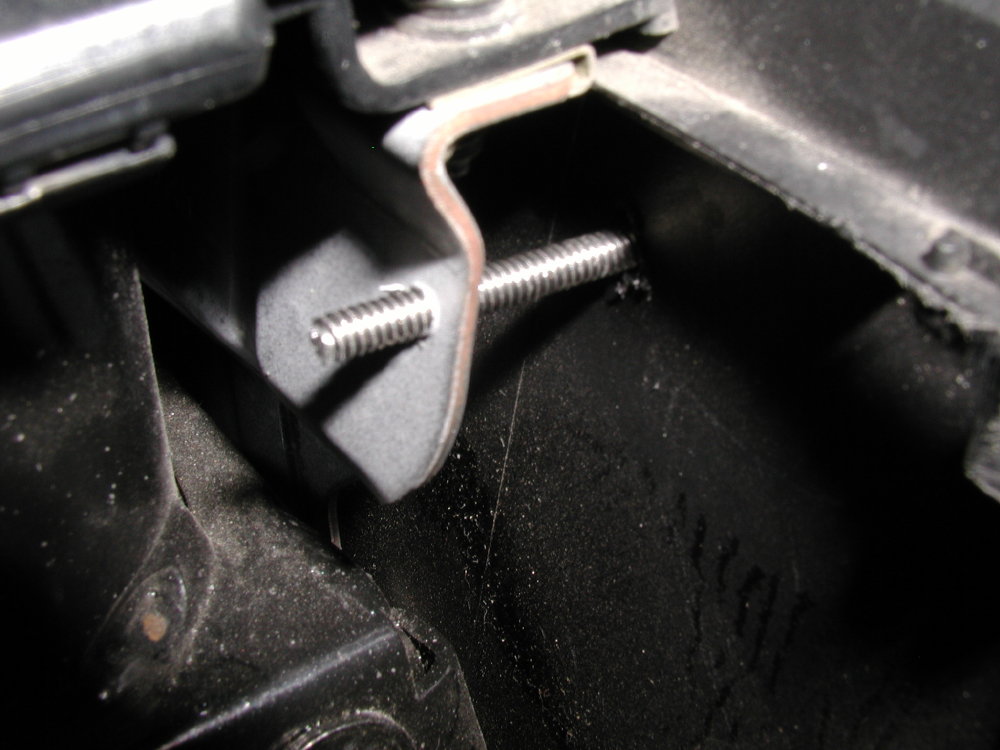
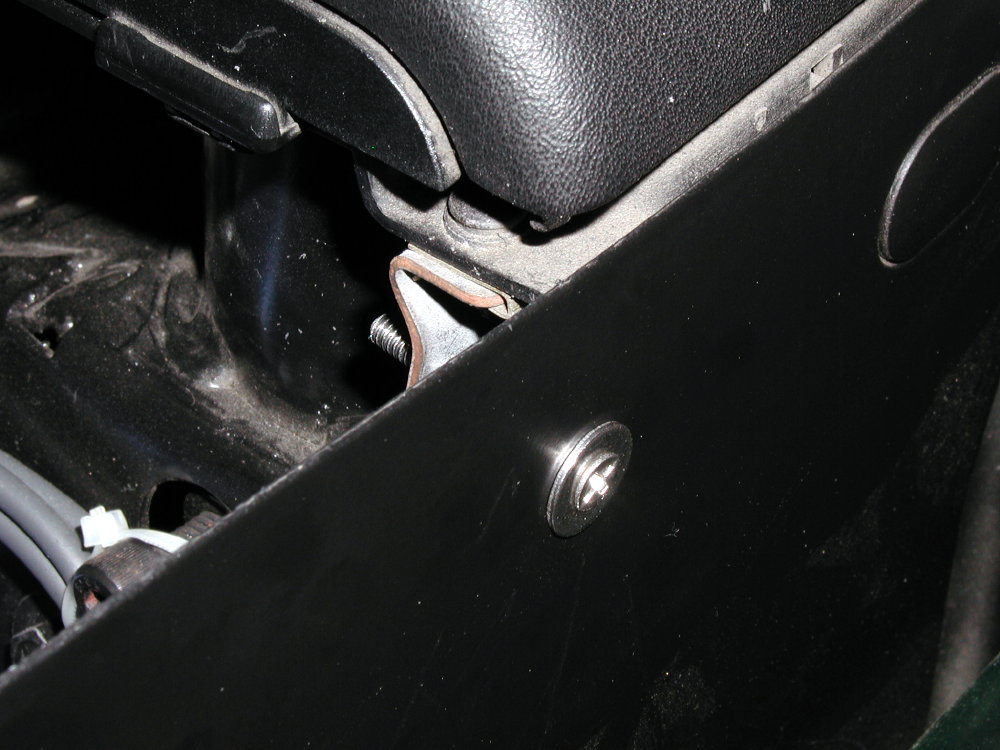
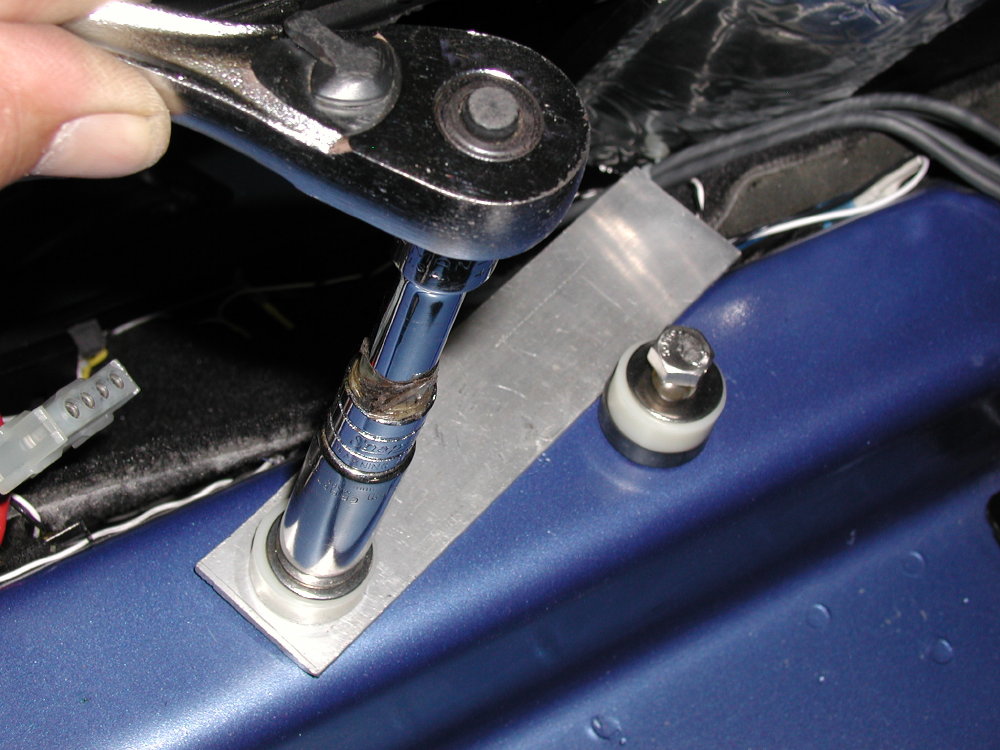
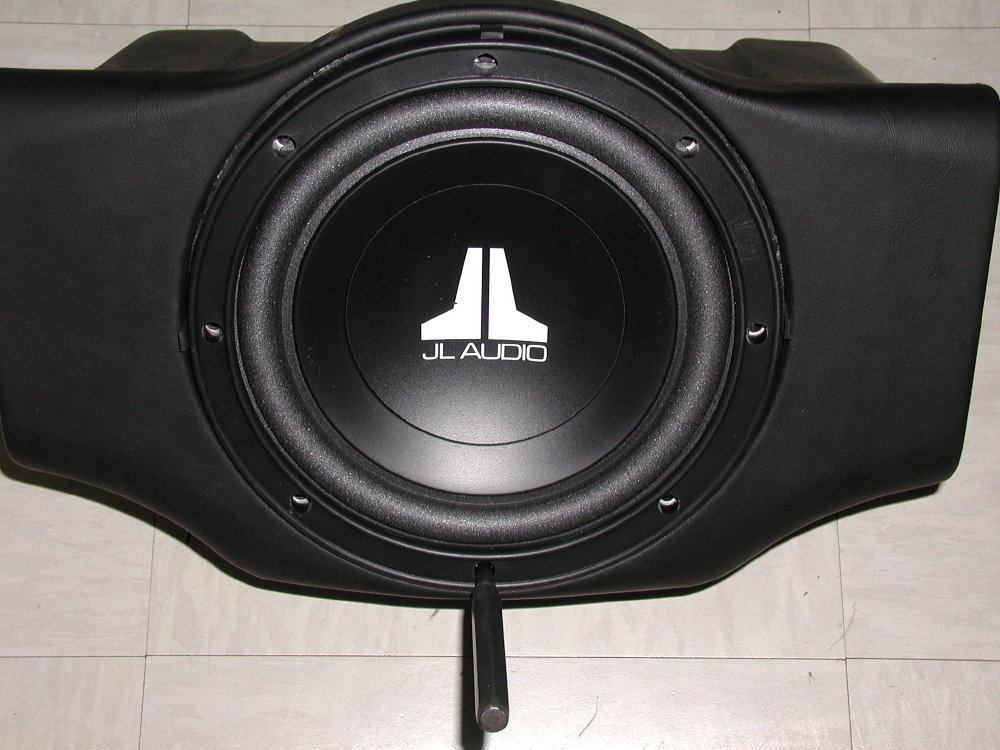
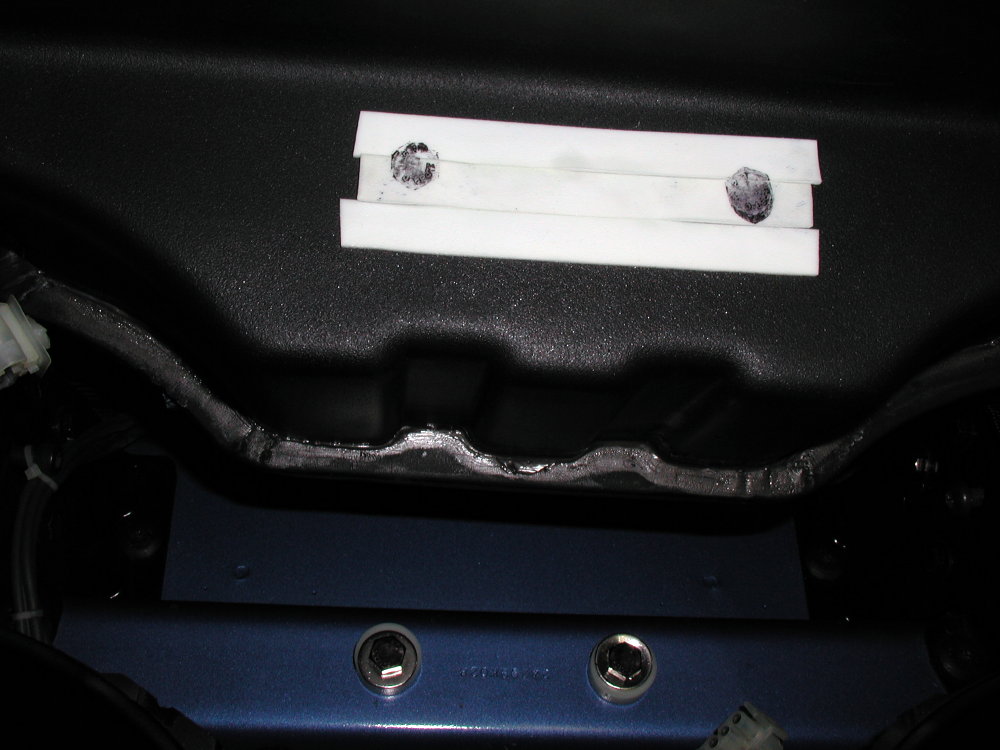
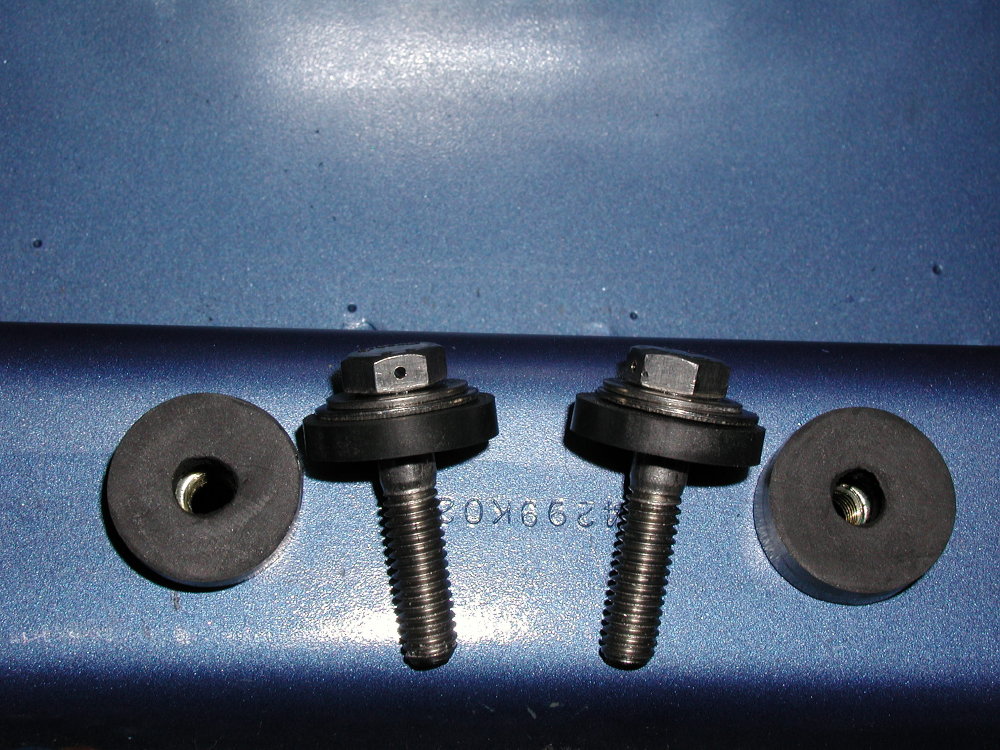
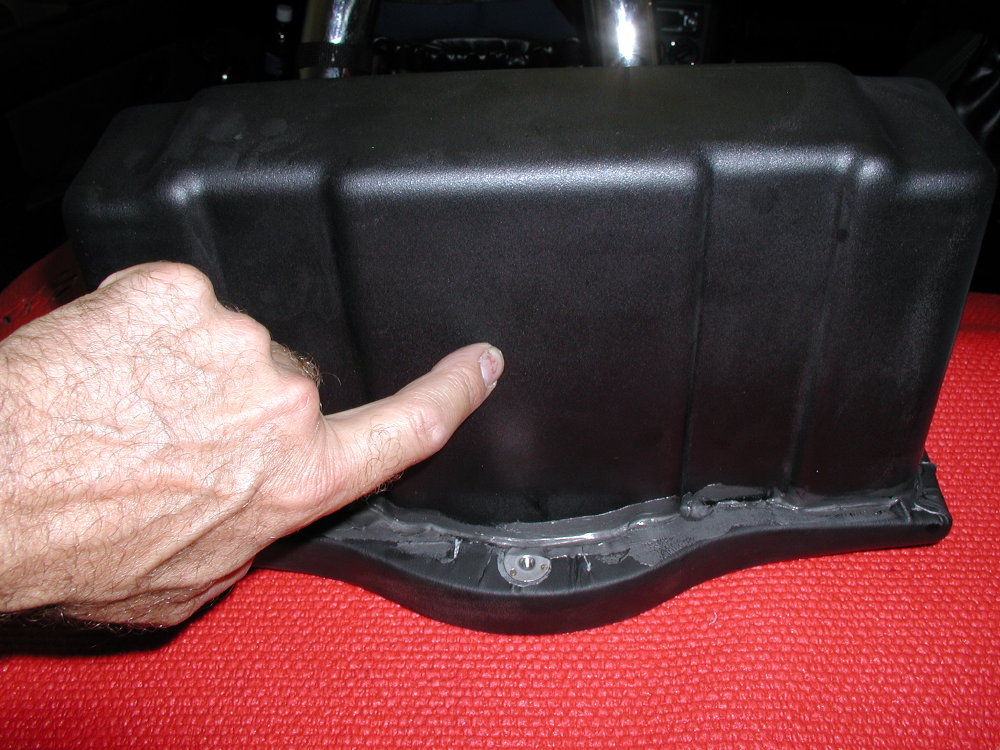
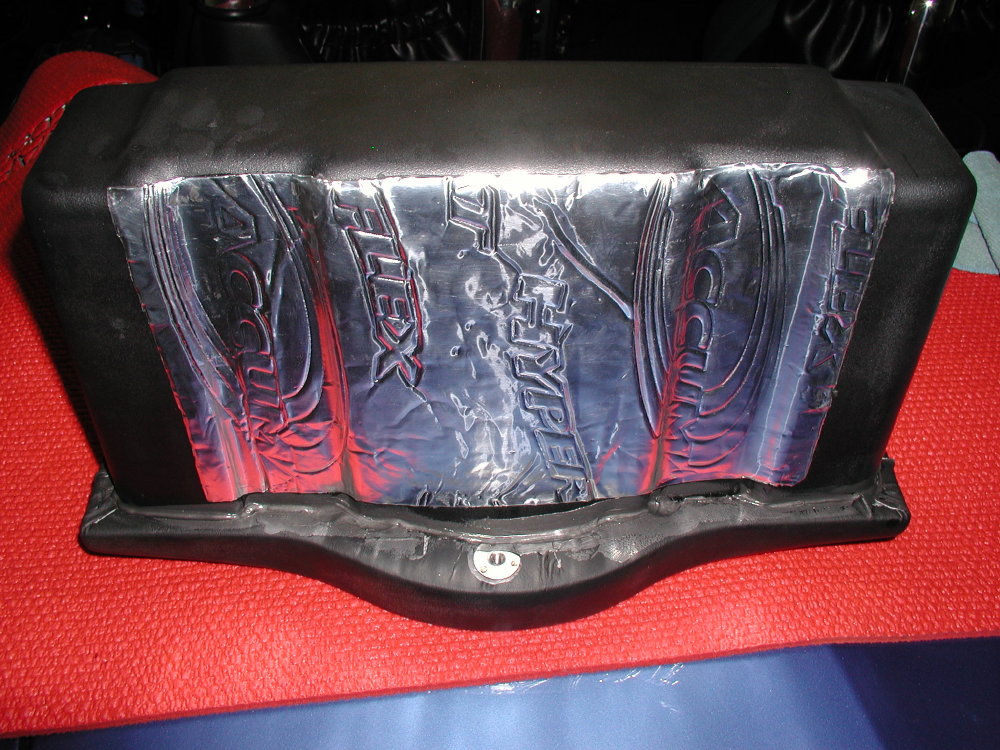
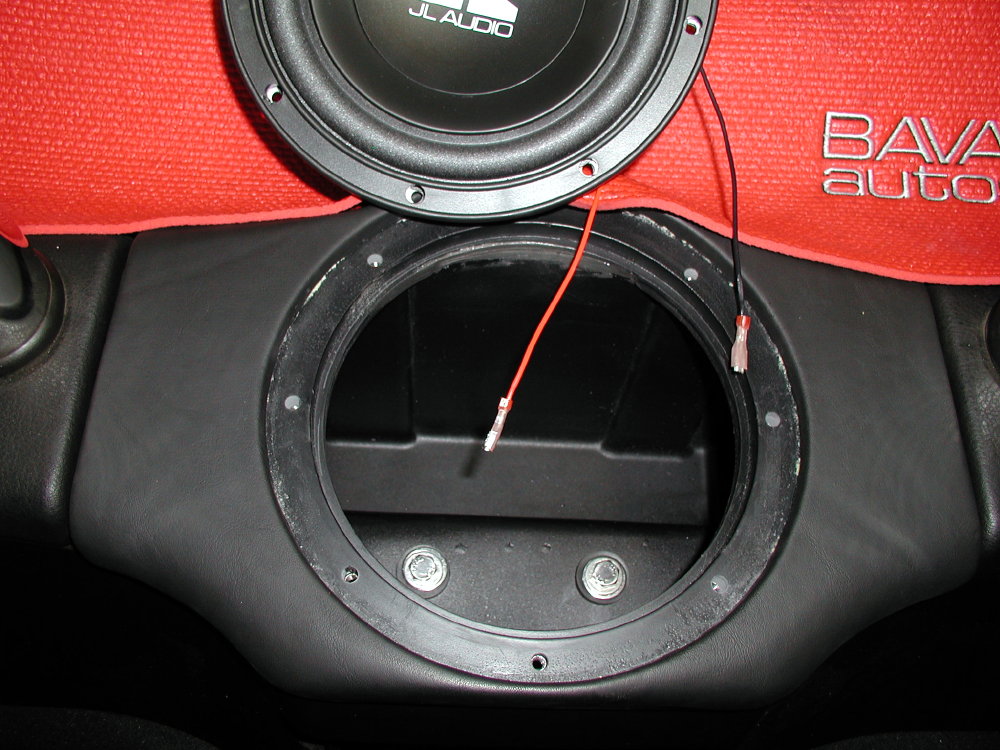
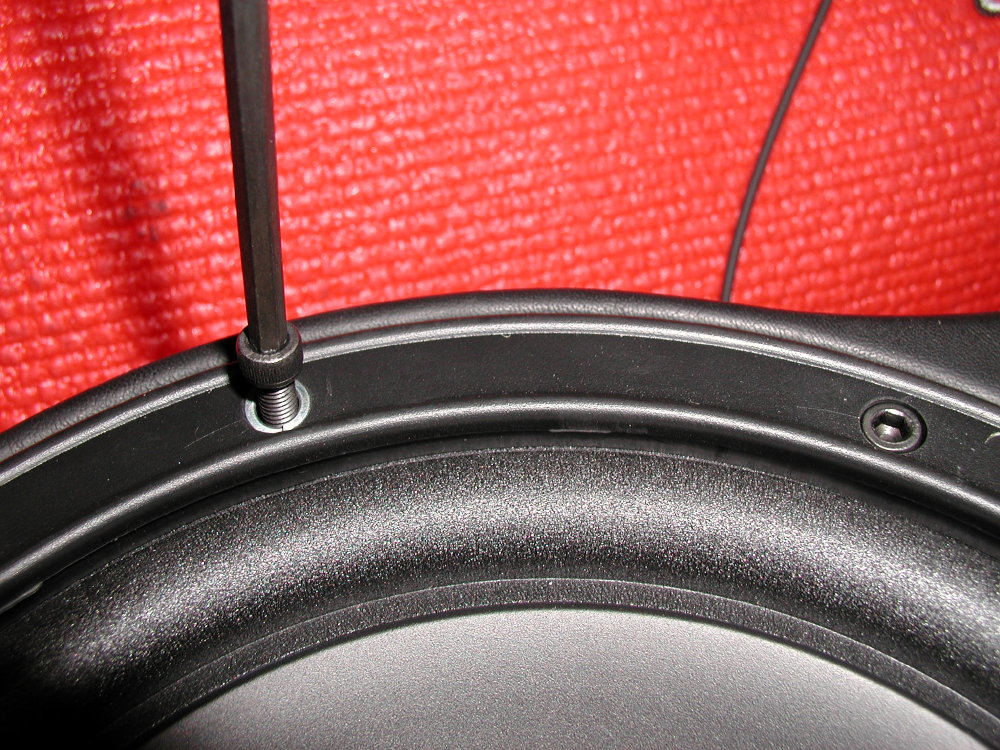
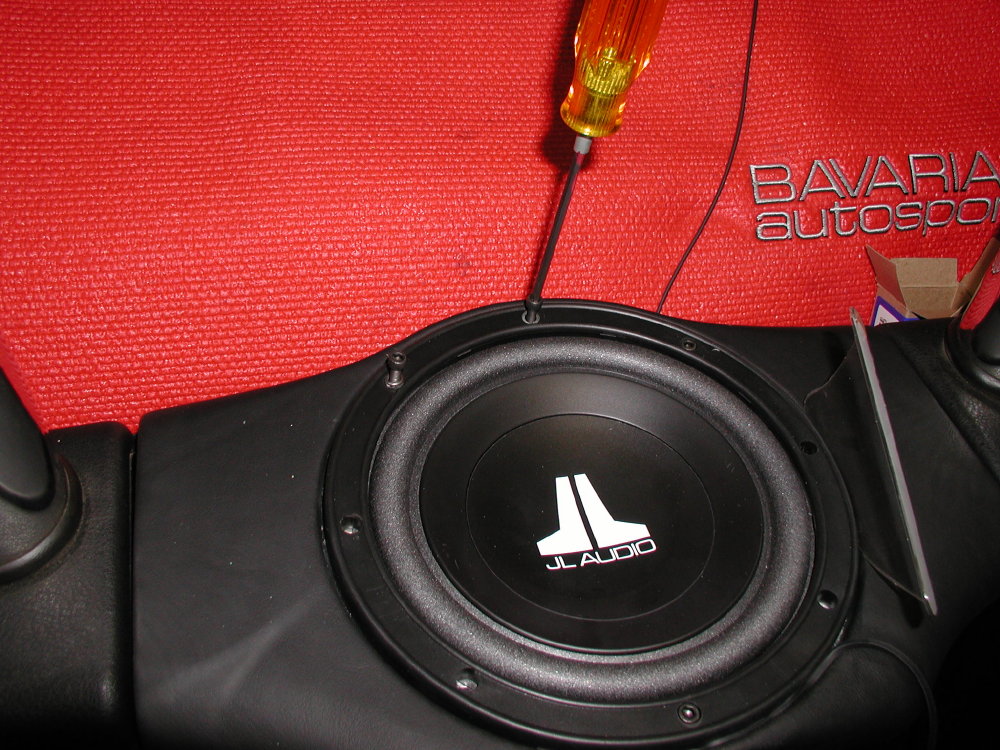
4) M80 INSTALATION: Connectors from OEM speaker harness. SECURE Z3 BACK PANEL WITH 6-32 SCREWS TAPED INTO BRACKET 7/16" NUT-CERT INSTALLATION TOOL (drill hole in aluminum stock) CENTER PUNCH HOLE LOCATIONS RECESS 10-32 T-NUTS 2-10LB DUMBBELLS for DRYING RTV TAPE for TRANSFERRING HOLE RUBBER SPACERS and STAINLESS BOLTS Flat Washers Super Glued (1) 1/8" + (1) 1/4" = 3/8" under Enclosure. (1) spacer under Washers. TAP ENCLOSURE to locate RESONANCE, ADD DYNAMAT TO DAMPEN DYNAMAT the inside of the thin rear Z3 compartment Cover JL SPEAKER is easily REMOVABLE to access enclosure Screws Poly Fill was used in cabinet. Hex Head Screws (spaced up with several lock washers) Use RUBBER TRIM of YOUR CHOICE in OPEN GAPS. (3/32" O-Ring shown) O-Ring is glued to a 3/32" thick flat rubber strip to wedge between covers. Finished Pictures:
5) M80 Supplemental PARTS: Ordered from McMaster Carr: Source MODEL # QTY Description Used For: McMaster-Carr 95105A151 2 RIVET NUT 5/16"-18 M80 Cab Anchor McMaster-Carr 90121A587 2 SS Drilled Hex-Head 5/16"-18 Bolt M80 Cabinet McMaster-Carr 91205A151 1-pk (25) Lock-Cap Screws 10-32x1" JL Speaker Mount McMaster-Carr 90611A300 1-pk Weld (T) Nut W/holes, 10-32 JL Speaker Mount McMaster-Carr 96515K42 3-ft VITON 0-RING CORD 3/32" TRIM
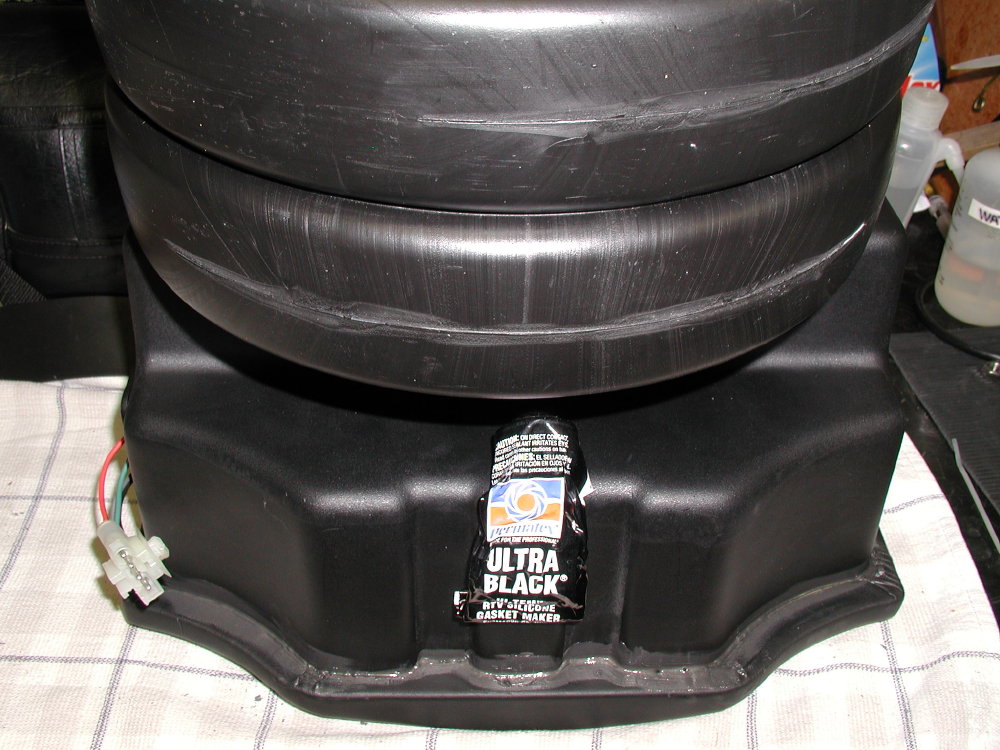
6) CONSTRUCTION COMMENTS and OBSERVATIONS: Vibration Solved: The form fit of the M80 kit is dead on. It is well at home in it's location. By using hardware fasteners instead of screws it is fairly easy to remove the speaker and enclosure for maintenance and accessing the roll bar hardware. By using 3/8" of rubber spacers under the cabinet and a 1/8" one on top, the 2 mounting bolts can be tightened to compress the washers and pull the cabinet in place. This shock mounting to the frame isolates the cabinet from the surrounding decorative panels and prevents vibration. An excellent design. To prevent the thin rear Z3 panel from vibrating, 2 screws were used to fasten it to the metal brackets. Additionally, DYNAMAT was applied to the full internal surface. Visual Alignment: Take care to center the speaker in the cover before bolting. If this is not done properly, the rubber surround will be offset causing the grill to obstruct the speaker surround. there is very little clearance here, so be careful when adding the O-Ring trim. I used some polycarbonate spacer pieces to center the speaker before tightening the Hex screws. Use about 3 locking washers under the screws to bring them even with the top of the ring. Speaker Removal: There are (3) holes in the cover that can limit the travel of the Hex mounting screws. Either drill these out carefully as to not penetrate the shell of the enclosure, or cut the screws to fit. Enclosure Sealed: Do not use RTV sealant under the speaker seal. The JL seal is designed to be an effective gasket if seated properly. You will thank yourself when removing the speaker to access the internal enclosure screws. Use high grade Permatex Ultra Black RTV for a clean look with no corrosive agents to attack the wiring and voice coil. Speaker Grill: Lacquer or common Nail Polish was used (3-coats) on the sharp cut edge of the metal grill to prevent it from cutting into the JL speaker foam surround. the vibrations or pressing on the grill could eventually cut into the foam and destroy the speaker. I believe this is an oversight by JL when providing this grill. This is especially important since I have a wind shield in contact with the grill. 7) LISTENING IMPRESSIONS The Door Speakers add a much needed presence to the sound. The MBQ 3.5" full range drivers have a high pass 6dB/octave roll-off below 800Hz. Provided by a 50-uF series capacitor. The Eclipse Head with MBQ components sound crisp and solid. The missing component has always been the bass. The Floor drivers have limited low end capability in their small sealed cavity. Now finally, the M80 is here. My first listening impressions with the M80 were surprising to say the least. I was envisioning taking everything apart to find vibrations. to my amazement I noticed immediately the absence of vibrations of the covers of the Z3 rear deck. Everything was quite quiet. The covers that concerned me most were the 2 under the roll hoops which squeak when pressing on them. It would have been a lot of work to remove the roll hoops to be able to remove and insulate these panels. The speaker appears to sound cleaner as the power is increased. I believe it needs a breaking in period to loosen the inherent stiffness of a new speaker. Even driving it to the point of blurring the cone from about 1/2" of movement sounds very solid. Obviously, it would take a lot of air movement to feel air movement from a speaker in the open convertible. Sitting into the drivers seat allows you to feel the bass through the seat which was not possible with the Model 65 rear firing. The annoying vibrating back panel is finally tamed. With the top up, the bass is much more than any sane listener could tolerate at full volume in such a small space. In Conclusion: I am very pleased with the adequate sound from this system. The bass from the M80 balances the rest of the system well. It is ideal for listening to Jazz and the newer digital synthesized sounds in today's music. The damping is as good as one can get from this small sealed enclosure. Response time and recovery is instantaneous with little or no boominess. The bass amplifier channel could use a limiter to equalize the variation in recorded music. Reaching for the bass level control is needed when changing music materiel. You wont find a better system that looks and sounds this elegant for your BMW Z3.
|

.jpg)
.jpg)
.jpg)
.jpg)
.jpg)
.jpg)
.jpg)
.jpg)
.jpg)
.jpg)
.jpg)
.jpg)
.jpg)
.jpg)
.jpg)
.jpg)
.jpg)
.jpg)
.jpg)
.jpg)
.jpg)
.jpg)
.jpg)
.jpg)
.jpg)
.jpg)
.jpg)
.jpg)
.jpg)
.jpg)
.jpg)
.jpg)
.jpg)
.jpg)
.jpg)
.jpg)
.jpg)
.jpg)
.jpg)
.jpg)
.jpg)
.jpg)